Sunday, November 30, 2008

Monday Lunchtime Sketch #45 -- Happy Christmas

November may go down as one of the worstest months for me. Enough said.

But I do need Christmas cards and used Mary Jo's sketch challenge design for this card.

I have more things to post, but not enough time tonight. So, I'll hopefully post again tomorrow with another Christmas card and a fun project.

Materials: papers, colored cardstock, rub-on (American Crafts); white cardstock (Georgia Pacific); stamp (Studio G); inks (Colorbox, Tsukineko); stickles (Ranger).

Edited: forgot to mention the pop-dots and the Nestibilities used to cut the ovals!! :)

Boy, it's been too long since I last posted. :)

Thanks for taking a look.

Saturday, November 1, 2008

MLSC #41 - Merry Christmas


It's probably NOT too early to be working on Christmas cards. It's NEVER too early to use up some of the stash that's been accumulating. It's ALWAYS fun to put one of MaryJo's sketch challenges to good use. So without further ado......

A fast, fun little card using some of the Basic Grey stash and a Making Memories rub-on. (I actually feel like I cheated on this card, since there's NO stamping.)

Materials: cardstock (Bazzill); designer paper & chipboard (Basic Grey); paint & rub-on (Making Memories); adhesives (Pioneer mounting tape & pop-dots).

Thanks for looking.

Tuesday, October 21, 2008

Monday Lunchtime Sketch Challenge #37

Another of my September projects which I didn't get a chance to post was (yet) another birthday card for work. Ronda's birthday snuck under the radar; she's new in the office this year and we didn't KNOW that she had the pleasure(pain) of another birthday until the happy date had passed.


So with my usual (about 1 night) notice I had the pleasure of making another birthday card. And, hey, since MaryJo makes such great sketches, it just seemed serendipitous to use her sketch for the needed birthday card.

I thought that I would post the sketch along with my interpretation of it, because of MaryJo's watermark. Many of her sketches not only have her name on them, but also the butterfly image. (I have to confess the first time that I saw one of her sketches, I thought that the butterfly was PART of the sketch!!)


So, for this card, I decided to VERY faithfully follow the sketch, and I INCLUDED the butterfly as well.


I die cut and embossed the butterfly shape with a new Cuttlebug die set that I had purchased at Roberts in Ogden, when we were out in Utah on vacation in August. The shape is cut out of an Amaco Artemboss sheet of metal. The black circle below the butterfly is also cut out of Artemboss, then run through the Cuttlebug script embossing folder to give it some character.

Here's the whole/completed card. The oval for the sentiment is the first design item that I cut using the (then, new to me) oval Nesties.

Materials:
cardstock (Bazzill); designer paper (Basic Grey); metal (Amaco); stamp (Studio G); ink (Colorbox); embossing powder (Stampendous); dies/embossing (Nestabilities, Cuttlebug).

I'm grateful to the online community for all the wonderful inspiration that is made available to share. I'm always so happy when I find a sketch that inspires me to make something that I can share with the people in my life. I know that my friends & co-workers enjoy these cards and I know that I owe a big thanks to the many sketch designers out there in the blogosphere who share so graciously of their talents. Thanks MaryJo specifically for this design.

Thanks to all who take the time to look here.

Sunday, October 19, 2008

Bandanna Technique

The challenge at the RangerInkLink group at Yahoo in September was the Bandanna technique. When I first read about it, I wasn't quite sure that this was a challenge in which I would take part.

I didn't think that I had any stamps (NO cute paisley stamps) that would work for the challenge, but as the month went by and as I looked at the various cards that were posted, I decided that I could probably give it a go.

I'm very pleased with the cardstock background that the technique produced. I didn't think that the "free-style" of doodling would appeal to me, but as I played more and more with the products, I found that I REALLY enjoyed making this piece.

Since I made this card almost a month ago, my poor pitiful brain is struggling to remember what products were used!!

I think the background has broken china and weathered wood distress inks. I then stamped the Autumn Leaves flourishes with black ink. After that I doodled with the Signo white pen.

Since I got my first set of Nesties (the ovals), I've been trying to use them as often as I can!!! The sentiment is a Studio G clear stamp.

Materials: cardstock (black - Bazzill; white - Georgia Pacific); inks (distress ink - Ranger; black - Colorbox); stamps (Autumn Leaves & Studio G); white pen (Signo); die (Nestabilities); adhesive (Pioneer mounting tape).

Thanks for taking a look.

Monday Lunchtime Sketch Challenge #39

As I am prone to type in some of my emails :::emerging from lurk mode:::

I've been AWOL for the better part of the last month. I'm having some health issues and I seem to spend all my energy each day just working and getting the minimal done around the house. I have been crafting, but just get too tired at night to post to the blog. :(

But today is a new day and if nothing else I can at least post this. Hopefully with the next couple of days I can post some of the other projects which I've completed in the last month.

So, having said that, I'd like to post my attempt at Mary-Jo's challenge for this week.

I knew when I saw this sketch that I really wanted to make a card for it. I've been wanting to get some Thanksgiving/Fall cards stockpiled as well, so that's where this card started.

The circle element in Mary-Jo's original sketch kinda got oversized!!! I love the new Cuttlebug die/embossing folder sets and have been wanting to use this fall leaf on something.

I distressed the edges of the orange paper block with the Making Memories distressing tool, then inked the edges with the Tea Dye ink. Otherwise, it's a pretty simple and straightforward card.

Materials: cardstock (Bazzill); designer paper (Basic Grey Mellow); stamp (Inkadinkadoo); ink (Tea Dye distress ink); metal (Amaco Artemboss); die/embossing (Cuttlebug); ribbon (Michaels); adhesives (Pioneer mounting tape & Pop-dots).

As always, thanks for looking.

Tuesday, September 23, 2008

Happy Birthday, Jenny

In my official capacity as official office card maker
I had the pleasure of making a birthday card for one of our co-workers, Jenny.

Jenny has been a friend to me since I arrived at this job 2 years ago. We both have 6 foot 5 inch (plus) skinny sons named Ryan.

So making a card for Jenny is NEVER a trial. This card is special to me, because I have NO idea where it came from. Talk about inspired.


I didn't plan for a monochrome card; it just happened that way.

I have gotten more comments on the cards where I have used this Happy Birthday sheet music from Flair Designs. It's a truly fun paper that sadly doesn't seem to be available anymore. (Thank goodness for stash!!!)

I distressed the edges of the sheet music paper, then edged with Tim Holtz distress ink (maybe, Tea dye). I distressed the edges of the cardstock before I matted the sheet music to it. Looking through the Die Cuts with a View fall paper pack I found the flourish paper with a cute pumpkin in the bottom corner. Judicious cutting got rid of the unwanted pumpkin. I pulled out my white/cream embellishments drawer and found the cream colored twill ribbon. But felt that the card still needed another embellishment.

Then I remembered the Cuttlebug embossing/die stamp with a birthday present. This was used to cut out a piece of Amaco ArtEmboss copper which was layered to another piece of the brown Bazzill cardstock. Done!!!

I printed a large (60 font) Happy Birthday on the inside of the card, assembled all the pieces on the outside and that was that. Probably one of my favoritist (can I use that word?) cards that I've made lately.


Materials: cardstock base (Georgia Pacific), brown mats (Bazzill); designer paper: sheet music (Flair Designs), flourish base (Die Cuts with a View); ink (Ranger distress ink); copper metal (Amaco); die cut (Cuttlebug); adhesives (Pioneer mounting tape), pop-dots.

Thanks for looking.

Monday, September 22, 2008

Baby shower gift card

One of the supervisor's at work is pregnant with her first child and one of the cards that I made in the last two weeks was a card for her baby shower.

My apologies for the interesting photo at the left. There's an orange shadow just to the right of the little envelope on the front of the card. It definitely WASN'T there in real life. (This card isn't my best work, but I definitely did NOT give a card with that orange on it!!!)

The envelope was made from a template found at this website. The template was enlarged 165% from the original template, so as to be large enough to hold a plastic credit card/gift card.

The envelope was cut from designer paper, assembled with double-sided tape and decorated with the sheer polka-dot ribbon running down the main seam. Just enough of the tape was left uncovered under the top flap of the envelope to slightly hold the flap down.

To make the card background the butterfly was stamped multiple times on the cardstock with Versamark and once with cranberry ink. The welcome baby sentiment was also stamped with the cranberry ink. (Don't look too carefully; it was not my best work stamping letters.)

Materials: cardstock (Bazzill); designer paper (Die Cuts with a View); butterfly stamp (Stampendous), letter stamps (Studio G); ink: watermark (Versamark), cranberry (Colorbox); adhesive (Pioneer mounting tape).

Thanks for looking.

Sunday, September 21, 2008

Welcome baby boy


Another week, another baby shower.

This card is for an acquaintance in one of the doctor's offices where I see patients.
Since she knows that she's having a baby boy, I knew my color scheme.

Plus, I seem to be in a rut with the coin change envelope card holders!

I kept this card a little simpler, since it is for a boy. No flighty butterflies for this young man.

Materials: base cardstock (Georgia Pacific); dark blue cardstock (Deja View); designer paper (MAMBI); stamp (Stamp Craft); distress embossing ink (Ranger); opaque white embossing powder (Stampendous); ribbon (Michaels).

Thanks for looking.

WSC #58: Autumn beauty

This is my first challenge card for Beate's Weekend Sketch challenge since she came back from her summer break.

This was a little hard for me. I wasn't quite sure WHAT to do with all those different blocks. But, obviously, it came together in the end.

All of the color blocks are embossed with Cuttlebug folders; all of that cardstock is from my stash. So this was nice in that it was frugal.

The main stamped image is from a new set of Inkadinkadoo stamps that I got this last week. I stamped it with bark ink, then clear embossed it. I inked the edges of the main panel with the bark ink, as well. The sentiment is from a Studio G (Michaels $1) clear stamp set; it was stamped with Versafine Sepia ink.

Materials: base cardstock (Bazzill); colored cardstocks (stash); designer paper (Die Cuts with a View); ink: bark (Versacolor), sepia (Versafine); embossing powder (Stampendous); embossing folders (divine swirls, pumpkin swirls, swiss dots); satin ribbon (Michaels); adhesive (Pioneer mounting tape & pop-dots).

Thanks for looking.

B-O-O to you

In one of the crafting magazines I saw a variation on this project, using a pre-made kit. I found the idea (maybe) in August, but can't find the magazine now to give credit for the inspiration.

I started gathering materials so that I could make at least 2 wallhangings, picking up the paper-mâché letters at Michaels.

(We interrupt this blog post for a brief moment of humor; at one point I was traveling in the car with 2 B's & 2 O's. You do the spelling on THAT one!)

Most of the other materials I already had on hand, including the black acrylic paint, the designer paper and most of the ribbon, though that also got supplemented with another Michaels run. The embellishment-die cuts were either cut out using Sizzix dies (ghosts & pumpkin) or Cricut (spider).

The completed letters were linked together using black grosgrain ribbon. And that was possibly the HARDEST part of this whole project. Paper-mâché doesn't take staples very well. Several of the staple points in the end had to be glued down with white craft glue, then stapled multiple times with the staple gun (loaded with 1/2 inch staples).


SO..... first the letters were painted black on 3 sides.

Then each letter was traced onto the backside of a sheet of designer paper.

The paper letters were glued to the front of each paper-mâché letter with a glue stick.


Next the edges of the letter paper were lightly sanded with the white sanding blocks you can get at the beauty supply store.

After deciding which embellishment die cuts were to be used, those were each cut out of cardstock and decorated as needed. (The ghosts got black cardstock behind the eyes and mouth; the spider got yellow cardstock behind the eye holes; the pumpkin was touched up a bit with dried marigold distress ink, using a cut'n'dry nib from Ranger.)


Finally everything was assembled.

Ribbons were tied onto each letter. Grosgrain ribbon was stapled and glued and stapled and stapled and stapled to each letter. The die cut embellishments were attached with pop-dots.

Materials: Paper-mâché letters (Michaels); black acrylic paint (Making Memories); designer paper (Die Cuts with a View); cardstock for embellishments (Bazzill); glue (Mono-multi); dried marigold distress ink (Ranger); ribbons (Michaels).

This was a fun project. I've sent the first completed BOO set to my daughter in Japan for her family to enjoy. The second set will probably NOT be assembled as a wall-hanging but rather as separate letters for a shelf decoration.

Thanks for looking.

Saturday, September 20, 2008

Last minute two-fer post - AFSS #35 & Monday Lunchtime Sketch #35

Well after 2 weeks of blog neglect..... I thought that I'd post something before charges were placed against me. I will say in my own defense that I HAVE been crafting and cardmaking, but just not posting. And (to admit the horror of it) I even asked myself in the last week if I just wanted to give the blog up. But I decided that I really do enjoy the community, so I just need to do it!!!

So, first of a couple of posts with recently complete projects. Since it's Saturday night, I thought it might be a good idea to post the two-fer card which I made for Allison's Silhouette challenge using MaryJo's sketch. I actually made this card on Thursday night, but wasn't able to get a photo of it until tonight.

I'd spent a couple of visits to Michaels looking longingly at the flower silhouette stamps, but in the end decided to be more frugal and use the tree silhouette stamp, which I already owned. I had originally punched the image out with a larger circle punch, but it ended up being too big for the front of the card. So I repositioned the larger circle inside a smaller punch to make a final image better suited to this particular sketch.

The trees and thankful sentiment were both stamped with Versafine sepia ink; after the edges of the kraft cardstock were distressed they were rubbed with Tea Dye distress ink. The dark brown cardstock below the thankful sentiment was embossed with the distressed stripes embossing folder in the Cuttlebug.

This was a fun challenge which I enjoyed as a way of getting myself back into a more productive mode.

Materials:
kraft cardstock (unknown from stash); brown cardstocks (Bazzill); designer paper (Basic Grey); ink (Versafine sepia & Tea dye distress ink); stamps: winter woods (Rubber Stampede) & thankful (Hero Arts); distressed stripes (Cuttlebug/ProvoCraft).

Thanks for looking.

Tuesday, September 2, 2008

Monday Lunchtime Sketch Challenge #33


I just love MaryJo's sketch challenges. Occasionally she'll have a sketch that I just can't get my mind around. But for the most part they're so much fun.

This week's sketch looked like it would be a fun, easy one to complete. I just needed to figure out what squar-ish stamp image to use. When I found the boo! among a new set of stamps that I got in Utah, I knew that I had a Halloween-themed card in the making.

I was also excited (sounds silly, I know) to use the black background paper that I found at one of the Salt Lake valley stores where I shopped. I must confess that Halloween has always been a favorite holiday for myself and my children when they were little. I loved making their homemade costumes each year. (Sometimes even finishing them on Halloween day!!)

Materials: black cardstock (Bazzill); designer papers (Sandylion, ProvoCraft, Die Cuts with a View); stamp (Heidi Grace); ink (colorbox); die cut (Cricut); adhesive: Pioneer mounting tape, Scotch foam squares, pop-dot.

Thanks for looking.

Monday, September 1, 2008

back from vacation

Once again my poor blog has been terribly ignored.

We went out to Utah on August 16, returned on August 22. We stayed up in the mountains above Odgen; it was lovely. Except after having lived at sea level for 2 years I found that there's not enough oxygen at 8100 feet!

We did have a lovely time there; while it's hot in Utah this time of year, there's none of the Florida humidity to contend with.

We hiked in the valley at Antelope Island and at the Odgen Bay waterfowl management area. Additionally I got a day to shop at some of my favorite papercrafts/scrapbooking stores down in the Salt Lake valley. Ah.......so much paper, so little money!!!

This photo was taken at Powder Mountain (where our timeshare unit was located) looking down into the valley.

It was lovely being in Utah during the visit of Tropical Storm Fay. We missed all the fun.

When we returned to Florida, this photo shows the street in front of our house. We have a lovely pond in the backyard. We, also, briefly had a pond in the frontyard, as well.


The neighbors report that the frontyard pond was up the driveway about 10 feet, but no damage was done to the house or premises in general.


Coming back from Utah I brought a little cold. However last week it BLEW UP into a monster cold. I'm still not sure whether it was the original Utah virus or if one of my patients at work helped me along with a bigger, better virus, but...... it's been a rough week. Saturday night my son called the house and asked me if I was taking testerone!!! Not a good sign.

I did some papercrafting last week. I actually made a card for Allison's Suggestive Sunday with a large ribbon. But I was too tired to take a photo of it. Maybe this week I'll finally get around to it.

Unless, of course the next female in the Atlantic, Hanna comes our way. My goal is to post everyday this month. Unless.....

Look for papercrafts tomorrow; and as always, thanks for looking today.

Wednesday, August 13, 2008

Tag You're It Challenge #19 -- Faux Postage

I can't remember where I found this challenge. (I've been having short term memory loss -- self-diagnosed -- and am really hoping that I haven't participated in this challenge before!!)

Since I have several "postage" type stamps that I really love, I knew that this was a challenge that I wanted to make something for. Photographing this tag was a challenge in and of itself. So my apologies for the "interesting" photograph. The one thing that I can say is that the colors for once are quite accurate.

The main "postage" stamp is a Hero Arts stamp. The three small leaves stamps, ummmm, I unmounted them a couple of years ago and didn't document well their source.

I'll probably put this tag on a card eventually, but I haven't yet decided exactly what I want to do with it.

Materials: cardstock (stash); stamps (Hero Arts, unknown); ink (black-Colorbox, colored-Ranger distress inks: Brick Red, Pine Needles, Dried Marigold); fibers (EK Success).

As always thanks again for looking.

Monday, August 11, 2008

Challenge Two-fer: TSSC 30 & OCC Limited Supplies

I've been using a lot of designer paper in the cards that I've recently done and I thought that Our Creative Corner's Limited Supplies challenge would be a Challenge. Also as often as I can, I like to use the designs that MaryJo presents at her blog, Technostamper.

So tonight's card uses the OCC challenge of: NO designer paper, along with MaryJo's design drawing for this week.

All of the cardstock used in this card comes from my stash. I shudder to think how truly old it is!!! The little leaves were stamped on the top of the main panel using Versamark, while the bottom of the main panel was embossed with the Cuttlebug distressed stripes folder. (Though you might not be able to tell that the bottom half was embossed from this photo!) The two squares were stamped with Versacolor bark ink; the squares were punched out with a Marvy Uchida square punch, then edges were inked with the same bark ink.

The two squares were mounted with mounting foam to provide a little more interest. I looked at assembling the card without the ribbon or with a bowless ribbon. But in the end I liked the look best as it looks now.

Materials used: cardstock (unknown); stamps: mini leaves, Winter Holidays (Autumn Leaves); ink (Versamark & Versacolor); ribbon (Michaels); adhesives (Pioneer mounting tape & 3M pop-up foam squares); Cuttlebug embossing folder & machine; square punch (Marvy Uchida).

As always, thanks for looking.

Friday, August 8, 2008

Monday Lunchtime Sketch Challenge #29

Well, 2 posts in 2 days with 2 cards!!! Is that a sign that the mojo muse has returned from Toledo?

I love Mary Jo's blog and challenges. I especially like that during the summer she's posting the Monday lunchtime challenge on Sunday night!!! Since I usually don't see the posts until Feedblitz delivers 'em the next day, the Sunday night posting is a bonus for me.

I had just gotten some new fall papers and rub-on's and stuff and right now have a yearning for all things fall. Especially when it's over 90º and very humid!!!

This was a really fast card to make; I'm thinking like, the proverbial, easy peasy kind. I had to deviate from the original drawing with the brads at the bottom right; just not enough room for 3 brads on this card.

Materials: card base (Georgia Pacific); cardstock (Bazzill); foil paper, rub-on (Me & My Big Ideas); gold designer paper (Die Cuts with a View); brads: (Michaels); embossing folder (Cuttlebug); adhesive (Pioneer Mounting Tape).

Thanks again for looking.

Thursday, August 7, 2008

FSU graduation

Just a quick post; I'm still not doing too much crafting, but I had to get this card out.

My son graduates from Florida State University on Saturday, August 9. His dad & I are so proud of him; he completed his BA in 3 1/2 years, after serving a mission for church for 2 years. He'll get his degree with honors, about which we're also quite proud.

The gold cardstock isn't quite a perfect match for the gold in the FSU colors, but hopefully Ryan won't mind too much.

Materials: cardstock (Bazzill); cap & gown (Jolee's); FS sticker (K & Co - collegiate stickers).

Thanks for looking.

Thursday, July 31, 2008

Whitewashed challenge card

I've been quite at a loss for crafting the last couple of weeks. I haven't done hardly any cardmaking, scrapbooking, sewing, nothing. I've really felt like my Muse left for Toledo. But I've finally started to get back into things and I have a card to share tonight.

I made this card for the monthly challenge at RangerInkLink at Yahoo groups. I love that group and have learned so much from the folks that participate in that email list.

The challenge for July involved using white Ranger products. Unfortunately I only had one of the several products which were listed. But one is enough, so I used the Perfect Pearl color of the Perfect Pearls product. (Confusing enough names?!?)

I stamped Perfect medium onto black cardstock using the Hero Arts Italian Poetry background stamp, then brushed the Perfect Pearls over the Perfect medium. That black cardstock was then torn and layered over a piece of ArtEmboss medium wt. Pewter metal, which was embossed with the Cuttlebug Script folder and inked with Ranger Alcohol ink. The corners of the metal sheet were embellished with corners die cut with Cuttlebug dies from ArtEmboss light weight black aluminum. Single musical notes were cut from the pewter metal sheet and distressed using Tim Holtz' texture hammer set. I printed out the quote from Shakespeare on the computer using Blackadder ITC font on white Georgia Pacific cardstock. Finally the card was assembled: grey cardstock base, black cardstock mat, script background, Perfect Pearl stamped torn black cardstock, printed white cardstock, embellished with corner die cuts & musical notes.

I made this card for my son's 3rd wedding anniversary; that's why there's 3 notes. Whether he and his wife will figure that out, I'm not sure.

Thanks for looking.

Sunday, July 13, 2008

Birthday card with thanks to K.Werner

I've known since Friday afternoon that I needed to make a birthday card for a co-worker for tomorrow. So, of course, I wait until Sunday afternoon to get started on it. Lucky for me there's such a great number of designers with great blogs which one can case.

For this card I must credit Kristina Werner for a great (fairly simple) design which she posted on Friday, July 11 (link here). My version is a little more monochromatic, because I don't have as many fun papers as she does!

Since I wanted to get this done quickly, I used some Die Cuts With a View scalloped edge cardstock for the edge on the card. I used more of my favorite BoBunny designer cardstock for the squares. Since the paper is double-sided, I didn't have to worry about finding another paper that matched; I just used both sides of the 2 different BoBunny papers.

I'm not sure that I'm in love with that ribbon with these papers, but that's sometimes whatcha get when you wait until the last minute!

Materials: white cardstock (Georgia Pacific); pink scallops (Die Cuts with a View); designer cardstocks (BoBunny); ribbon (Michaels); adhesives: Uhu glue; inside card: Happy Birthday! rub-on (Making Memories).

Thanks again to Kristina and thanks to all for looking.

Wednesday, July 9, 2008

Graduation celebration, again

When we first moved to Florida back in 2003, I served in the Young Women's program at church. I worked with 12- & 13-year old girls. The first of those young women is now graduating from high school. And I wanted to make a special card for her.

Back in April Beate had a weekend sketch challenge using this layout; my version of that card from back in April is here.

But I've also used the two papers from that wedding card, for school graduation cards; so.... with a few tweaks I made a card for my dear friend, Amanda.

Materials: cardstock: Bazzill; designer paper: Die Cuts with a View (congratulations), Hot Off The Press (black stripe); silver cardstock (behind brad): unknown source; Grad brad: Heartland Paper Co; ribbon: Joann's; adhesive: Pioneer mounting tape.

Thanks for stopping by and taking a look.

Sunday, July 6, 2008

Welcome, baby boy

Once again I'm trying to pay attention to my poor, neglected blog.

I've done a little bit of crafting/cardmaking in the last 2 weeks, but not much. My muse took a hike. But getting pictures from a dear friend of her new little boy helped to jump start the old mojo once again.

The design for this card is lifted from a design by Abby Schultz, as seen in the CARDS magazine for May, 2008.

I took her basic design and modified for the materials, which I had on hand. Since I wanted to get this card made and in the mail quickly, I made it without stamping.

Materials: white cardstock (Bazzill); dark green behind button & heart (Deja Views); baby boy designer paper (Me & My Big Ideas); blue/green/orange grid paper for heart shape (Deja Views); button (Foof-a-la); adhesives: Crafters Choice, Pioneer mounting tape, Diamond Glaze; grosgrain ribbon (Michaels); embroidery thread (DMC).

There's a few challenges this week that I may try my hand at; hopefully I'll be posting more frequently. Thanks for taking a look at this card today.

Thursday, June 19, 2008

Thanks a bunch - AFSS22 & Lunchtime Sketch Challenge 22

At work on Monday one of the community volunteer groups brought in newborn kits for the office. These are so appreciated, as some of the young women, to whom we provide services, have nothing for their babies. After the volunteer left, my boss called out: Margaret, I need to commission 2 cards. One for the church ladies and one for a Girl Scout who is also collecting materials for our office to distribute to families with newborns.


This is card #1 for the church ladies (as I keep calling 'em in my brain.) I knew that I wanted to participate in MaryJo's Monday Lunchtime Sketch Challenge, as well as Allison's Suggestive Sunday challenge. Allison's challenge was especially appropriate for this card: stamped flowers. What could be more nicer on a thank you card for the church ladies than flowers?


I substituted a square sentiment box at the bottom of the card front, instead of MaryJo's oval because I don't have an oval punch. (Someday Santa will bring me some Nesties?)

I stamped the flower images on 2 scraps of Basic Grey Blush paper and the stems on Basic Grey Two Scoops paper. All of the card base materials is BG Two Scoops.

This was a very easy card to put together. Thanks to Allison & MaryJo for their help in creating this thank you card.

Material: cardbase: Die Cuts with a View; designer papers: Basic Grey; stamps: Autumn Leaves; ink: Colorbox; adhesive: Pioneer mounting tape & Pop-dots; pen: American Crafts.

Thanks for looking.

Sunday, June 15, 2008

Monday Lunchtime Sketch Challenge #21

Here it is Sunday and I've finally got a card finished for MaryJo's Monday Lunchtime Sketch Challenge; one can't accuse me of being too prompt on getting these challenge cards done.

This is the second card for one of MaryJo's challenges where I've ended up with a very patriotic card. (I think the first challenge that I did for her used virtually the same papers as this card.) I'm NOT sure why I keep ending up with flags, but ..... there ya go!

I used the same Die Cuts with a View cardstock pieces on this card, that I did my last flag card. I also used a Hero Arts stamp (see the photo below for a close up view of the stamped image.)


I stamped the Lady Liberty stamp on white cardstock with black ink and embossed with clear embossing powder. I had tried initially with clear embossing ink and black powder, but the statue of Liberty image just blurred out. I was happier with this final image. I didn't think that I wanted to leave all the cardstock white, so I got out my Cut n' Dry nibs and colored. I used Antique Linen on the back of the stamped image and Old Paper for the outside edge of the stamp.

I have to take two seconds and rave about the Cut n' Dry nibs. When I first saw them at Michaels, I thought: WOW! Those are expensive little things. Since I've purchased them and started using them on a regular basis, I don't know HOW I got by without them. If you've looked at them and had the same sticker shock that I initially had, wait for a 50% off coupon and get them then. They're seriously worth every penny; even at full price.

I used the Cuttlebug Script embossing folder to emboss the red stripes on the card. I thought it gave the card a little more interest without getting too busy. (Remember: this is my simple brained weekend.)

Materials: cardstock: Die Cuts with a View; cuttlebug embossing folder; stamp: Hero Arts; ink: Colorbox (black), Ranger (Antique Linen, Old Paper); clear embossing powder: Stampendous; flowers: Primas; brad: Making Memories; adhesives: Tombow's Mono-Multi, Pioneer mounting tape, 3M mounting foam squares.

As always, thanks again for looking.

WSC #52 - Boo!

Once again it's Sunday and time to post my card for Beate's Weekend Sketch Challenge, before the thunderstorms arrive and keep me offline.


I thought this was a fun sketch and I liked the examples that were presented using this design. I especially liked those cards which kept it simple. I think I'm in a simple mood this weekend.

But I didn't want the card to be too plain, so as well as using the 2 designer papers and the main stamped image, I decided that I wanted to try some tone-on-tone on this card.

I stamped the BOO! on the black cardstock with clear embossing ink and embossed with clear embossing powder. The flash on the camera REALLY made the embossing SHINE! It's really more subtle in real life.

Materials: cardbase: Georgia Pacific cardstock; black & purple cardstocks, orange designer paper: Die Cuts with a View; purple designer paper: Karen Foster; purple ink: Colorbox; clear embossing ink: Ranger; clear embossing powder: Stampendous; Happy Halloween stamp: All Night Media; BOO! stamp: Rubber Stampede; brad: Around the Block; adhesives: Pioneer mounting tape.

Thanks for looking.

Monday, June 9, 2008

WSC #51

A last minute post before I head off to work with a card for Beate's Weekend Sketch challenge.

Someone commented on one of my card's this weekend that summer had only just gotten here and it was too early to start on making cards for the fall.

I thought, that in keeping with a more summery theme, that I would use some Pebbles Inc. papers that I got a couple of years ago. I think that I've only used these papers once before and it was fun to pull them out for this card.


The stamping on this card is on the yellow "summer" block; one stamp from one of the Hero Arts seasons stamp sets. This was a good challenge for me, since I don't think I've ever used this particular stamp on any project. So, I used older paper from stash and an older neglected stamp. Thanks, Beate.

Materials: cardstock: Georgia Pacific (white card base), stash (green mat); designer paper, starfish die cut: Pebbles, Inc.; stamp: Hero Arts; ink: Versacolor.

Thanks for looking.

Sunday, June 8, 2008

Lunchtime Sketch challenge #20

At Mary Jo's Technostamper blog there's a challenge posted every Monday. And today is Sunday and I've finally got that challenge card done.


I'd heard about ladies "suffering" from insomnia during menopause; I can personally say now that at least it's a good time to make cards.


This card, also, uses the new Bo Bunny designer paper that I found last weekend at Picture in Time Scrapbooks in Port Saint Lucie, FL. I'm rather surprised at myself; I was never a pink and white kind of girl. And I'm not normally a pink and white kind of woman. But this paper has been fun to play with.

Materials: cardstock: Georgia Pacific; designer paper: BoBunny; stamp: thanks (Hero Arts); ink: red (Colorbox), light rose shadow ink (Hero Arts); ribbon: craft supply; adhesive: Pioneer mounting tape and pop-dots.

Thanks for looking.

AFSS20 - late entry

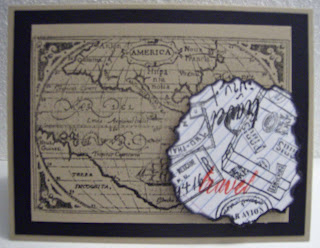
Okay, so Allison posted this Burn, baby, burn challenge. And I don't do matches; why, you ask? I dunno. It might be because I'm a Pisces and avoid matches like a plague. Maybe it's 'cause my daughter had an apartment fire in 2006 and lost almost everything she and her family had. So, when I first saw the challenge, I knew: NO matches for me.

So I found a Photoshop tutorial on how to create burnt edges on a project. And I created a little piece of paper with burnt edges. (I couldn't actually complete part of the tutorial; something you can do in full Photoshop, that isn't available in PSE.)

Then I contemplated my "burnt" piece of paper for several days, wondering WHAT I was going to do with this "thing". My inspiration led me back to travel themes and yet ANOTHER travel card. Gee, I've been back from Romania for 2 weeks; don't you think I'd get over it?!?

The "piece" of paper is actually from a download of "paper" from Shimelle's website. After "burning" the edges, I stamped various travel themed stamps on the paper. Since it looked boring all in black and white, I colored with a red marker the word travel on one of the stamps to provide SOME interest on this card. After that the rest of the card came together easily for me.

(BTW, this was the first time that I had actually colored on a stamp with a marker; I know that makes me horribly retarded; and it really was easy!!)

Materials used: cardstock: stash/unknown sources; paper: white printer paper; ink: Colorbox; marker: Marvy Uchida; stamps: Par Avion & republique mexicaine (Hero Arts); suitcase & world map (Inkadinkadoo); travel word (Limited Edition); adhesive: Pioneer mounting tape & pop dots.

Lastly: sorry about the poor photo. I didn't want to dig out the digital SLR, so I just used the digital point and shoot; quality will tell.

As always thanks for looking.


Friday, June 6, 2008

thankful for....

I first learned about the Sheetload of Cards site at Flossie's blog. Thanks, Flo.

But this is the first time that I've tried one of their sketches. I must confess that I didn't make 10 cards this time. I used some scraps that I've had for my first attempt. This month's sketch can be found here.

As well as providing the sketch for this month's card, the challenge was issued to use some of the $1 stamps we've all bought at the craft stores. This challenge particularly hit home, since I'd JUST bought some new Studio G stamps this week!!

So for this challenge & sketch I used a little stamp from a new Studio G set for the month of November: "I am thankful for U."

Materials: cardstock: Bazzill (brown), unknown source (cream); designer paper: Basic Grey (Mellow); stamp: Studio G; inks: Ranger, distress ink & sepia archival ink; die cut letter: Sizzix; flowers: Prima; brads: Making Memories; adhesives: Xyron, Pioneer mounting tape, Tombow Mono Multi.

This was a fun sketch design to play with and I'm glad to start making cards for the fall. Too often I wait until the last minute to make my cards for Thanksgiving and Christmas. I'm looking forward to all the great sketch designs, which will have my card cupboard filled up well ahead of time.

Thanks for looking.

Sunday, June 1, 2008

WSC #50 -- Thinking of you

I haven't had the chance for a few weeks to participate in Beate's Weekend Sketch challenges. So I was excited that we didn't have any major plans for the weekend and that I might have some crafting time.

I've been trying to be a frugal crafter of late, using mostly my stash for creative materials. But there was a sale this weekend at the little scrapbook store in Port Saint Lucie, FL (just down the road from where I live) and I had to go in and support them. During this visit I found the fun designer paper that I used in today's card.

I had had every intention of following Beate's design to the letter (so to speak), but when I got to stamping my sentiment on the one panel on this card, it just didn't fit!!! So everything literally got turned on the side at the last minute. But I like the final card; the colors are NOT my norm, but it's good to get outside of the mono-tone box once in awhile?!?

Materials: white cardstock: Georgia Pacific; pink cardstock: Bazzill; designer paper: Bo Bunny; stamps: Studio G; ink: Colorbox; white grosgrain ribbon: Michaels; adhesive: Pioneer mounting tape.

Thanks for looking.

Friday, May 30, 2008

travel

I was tired and cranky last night, but really wanted to do some crafting. I've enjoyed Mary-Jo's challenges at Technostamper and wanted to try my hand with this week's challenge.

I'm in a kind of mono-tone mood; consider two of the last three posted cards. :)

I've also got travel on my mind, but that's 'cause I'm still playing with the photos from Bucharest. So with that in mind:

Materials: cardstock: Bazzill; designer paper: Basic Grey; embossing folder: Cuttlebug; stamp: Limited Edition; ink: Tim Holtz distress ink (Walnut stain); brads: Imaginisce; adhesive: Pioneer mounting tape.


Wednesday, May 28, 2008

Back from vacation

Once again I have been neglecting my poor blog, but I have a relatively good excuse: we were on vacation to Bucharest, Romania.


north side of Palace of Parliment

While we were only gone for 1 week, I'm afraid that the blog was ignored for more than that. You know the excuses already: work, life, sleep. But I thought that I would share a picture or two from Romania.

My dear sweet mother-in-law during her lifetime was known to share the phrase: it's nice to go away, but it's nice to come home. We loved Romania, the people, the sights, the food. But it's nice to be home and back to "real" life.
Thanks for looking.

Happy Birthday, Janice

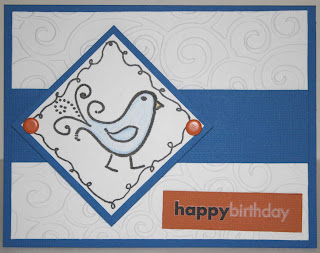
We have a relatively new nurse working with us now and tomorrow is her birthday. When our education coordinator today mentioned that tomorrow was Janice's birthday, I couldn't stop myself from asking, "Do you want a card?"

Since Janice has only been with us a few weeks, I don't really know her well enough to know her favorite colors, etc, so....... this card is just sorta spirit-driven. (I hope my Florida State Seminole son never sees this post; the colors on this card look like they were inspired by the spirit of a Univ. of Florida Gator!!)

The background is embossed with the wonderful Cuttlebug D'vine Swirls embossing folder. The stamped image is from Autumn Leaves; the doodling around the birdy is my own (which is scary for me.)

Materials: white cardstock: Georgia Pacific; colored cardstock: Bazzill; colored pencil: unknown; happy birthday rub-on and orange snaps: Making Memories; black pen: American Crafts; adhesive: Pioneer mounting tape.

Thanks for looking.

Little Lamb

The challenge this month at the RangerInkLink group at Yahoo groups was entitled Snap, Crackle and Pop. A variety of different crackle products were suggested for projects. Of the products listed I only have a couple of colors of distress crackle paint. So, right from the get-go, I knew that I didn't need to stress too much about WHICH product to use.


But from there, I didn't really know too much what I wanted to do, except that this seemed like a really great opportunity to play with a product that I've really not used too often previously. So, with PLAY in mind, I pulled out some of the Tim Holtz Grungeboard which I've had for awhile and used a couple of my old Sizzix steel rule dies to cut out some shapes to paint with the crackle paint. (I now have, in addition to this complete project, a couple of primitive hearts painted in red.)


I painted the die cuts last night, left them to dry overnight and decided that in the morning I could figure out what I could do with the finished products. What I found this AM, exceeded my highest hopes. I really like the look of this little lamb.

To give the face and ear more definition, I cut a second face and ear from grungeboard and colored them black with my black calligraphy pen. I colored the feet with the same pen, but didn't bother to die cut more feet; I just colored over the crackle paint.

Once my little lamb was finished, the rest of this card came together quite quickly. I like the neutral monotone look of this card. It will be a nice card to have in the stockpile for that baby shower that you have to attend, where the baby's gender is unknown.

Materials: cardstock: unknown (stash); designer paper: Masterpiece Studios; grungeboard: Advantus/Ideo-logy; crackle paint and distress ink (antique linen): Ranger; grosgrain ribbon: unknown (stash); calligraphy marker: Marvy Uchida; white ink pen: Signo; adhesives: Pioneer mounting tape and Crafter's Pick The Ultimate Glue.

As always, thanks for looking.


Sunday, May 11, 2008

Congrats, Grads

I don't know if I'll get to any challenges in the next week; nothing like KNOWING your life is going to be crazy busy. But I had to make a card this weekend for family. Our nephew will be graduating high school in June. I just can't believe that that young man is 18.

When I was shopping at Michael's last week for another project, I saw the Jolee's graduation embellishments on display. I knew that I wanted to use part of that set on this card.

Since this card is for a young man, I knew that I needed to keep the card less frilly. I also used some of my favorite Congratulations paper from Die Cuts with a View; I love that paper for both graduations and weddings. Finally to keep the embellishment simple (but not too plain), I added a Tim Holtz grungeboard flourish, painted with Adirondack silver paint dauber.

Materials: white cardstock: Georgia Pacific; black cardstock: unknown (stash); designer paper: Die Cuts with a View; grungeboard: Advantus; paint: Ranger; cap, gown, diploma: Jolee's/EK Success; adhesive: Pioneer mounting tape and Crafter's Pick glue.

I'm hoping that he will like this, though I'm sure the other (blue) piece of paper in the card will likely be more appreciated.
Thanks for looking.

Wednesday, May 7, 2008

In Love

I saw this title posted on another blog while I was just out blurfing (just love that compound word). And thought of this picture that I took in late April. They tease me a lot at work, when I talk about being in love with this guy. I've been known to sorta "stalk" him (and his wife who also lives in the vicinity). Unfortunately this is about the best shot that I've gotten of him.

While this isn't a photo blog (and I'd never claim to take very many good photos), I just wanted to share this photo tonight. Ah, the poet said it (I think): my love is like a red, red rose....... no wait, he's a cardinal!!!

Thanks for looking.

These colors don't run.....though the ink might

I've enjoyed looking at the Monday Lunchtime Sketch challenges posted at the Techno Stamper blog. I decided to try my hand at this week's fun little sketch.

I have a number of Die Cuts with a View paper packs that I had purchased for scrapbooking, but haven't been using. I had made a couple of cards for a magazine submission using some of these papers and knew that I had these colors available. As soon as I saw the sketch for this challenge, I knew that these two papers would work together perfectly. I'm not sure that the front of this isn't just a little too plain; I've thought about doing this again, but embossing the stamped image to make it "pop" more. We'll see how much time/motivation I have.

Materials: cardstock, designer paper: Die Cuts with a View; stamp: Hero Arts Clear Design July set; ink: weathered wood (Ranger distress ink); thread: Coats and Clark; adhesives: mono-multi (Tombow), mounting tape (Pioneer).

Thanks for looking.

Sunday, May 4, 2008

Weekend Sketch Challenge #46--Mother's day flourishes

Well, I've not been holding to my own New Year's resolution too well; I had wanted to post at least once a week to the blog. But the last couple of weeks have been.....life challenged. But, as Ali Edwards might say: I'm okay with that. I craft and blog when I can. But.......I have missed it the last couple o' weeks.

I have managed for the first time in a couple of weeks to get a card made for Beate's Weekend Sketch Challenge. In my spare time I read on one of the blogs that the crafter was going to use this sketch for her mother's day card obligations. I thought that I could/should do that too.

I have been playing with some of my designer paper that has swirls lately and wanted to use that again for this card challenge.

Materials: black and orange bling cardstock: Bazzill; cream background cardstock: unknown (stash); designer paper: Me and My Big Ideas; rub-on: Basic Grey; stamps: Autumn Leaves (Flourishes I and Swirls I); ink: Colorbox (black) and Ranger (black distress ink); adhesive: Pioneer mounting tape.

Thanks for looking.

Sunday, April 20, 2008

WSC # 44 - wedding card


It's Sunday and once again I'm hoping to get my card for Beate's Weekend Sketch Challenge uploaded before the thunderstorms get started here in Florida. (Note to self: start working on these on Friday night during the summer or you may get "rained" out, like I did 2 weeks ago.)

I've been making a wedding card with the same materials for about 2 years. (I tend to be a creature of habit and when I find something with which I am comfortable, I don't change very frequently.) But I liked the idea of using my old standard materials in this new sketch.

Materials: cardstock: Bazzill; designer paper: Die Cuts with a View (congratulations), Hot Off The Press (black stripe); rubber stamp: Savvystamps (floral wedding cake); ink: Colorbox; embossing powder: Ranger; ribbon: JoAnn (organdy); silver leafing pen: Krylon.

Thanks for looking.

Tuesday, April 15, 2008

Another challenge twofer: AFSS13 & Hero Arts Hello Birdie challenge

There's just not enough hours in the day, week, month...... well, you get the picture.

There's SO many fun challenges out there and not enough time. So, I'm doing another twofer; one card to submit for two different challenges.

I love Allison's blog, Stampin' When I Can. I have played in a couple of her challenges before, but have been time challenged the last few weeks. This week's challenge, AFSS13, using just scraps looked easy enough. Then I also read the challenge for this week at the new Hero Arts blog. Their challenge this week, Hello Birdie, wants a project with a bird image/theme and 1 Hero Arts stamp.


So here's my project for both challenges.


I went through my paper scraps looking for spring-y, floral images. I found the 5 included here. Only 2 of them are from the same company; the other 3 are just random.


The Hero Arts stamp is the Spring stamp used as the background. I don't currently have any HA bird stamps, but maybe that'll change soon.


I stamped the Spring stamp with Hero Arts shadow ink to give it a softer, more muted feel. Then overstamped the birdie with Colorbox ink. After distressing the edges of the white panel, I inked them with the shadow ink.

This was a really fun card for me to do. Lisa Spangler, the featured blogger at Hero Arts this week, described herself as "The Bird Woman". I, too, just love birds. We have a pet cockatiel, Colonel. I regularly feed peanuts to the birds (and squirrels) at work.


Last night as I was getting my walking/exercise in, I shot this photo of a bird's nest in the neighborhood.
So, enjoy this birdie offering.

Materials: cardstock: unknown source (stash); paper scraps: Anna Griffin, K & Co, Deja Views, one unknown; stamps: (spring) Hero Arts, (birdie) Autumn Leaves; ink: (soft rose shadow ink) Hero Arts, (cranberry) Colorbox; adhesives: Pioneer mounting tape, All Night Media Pop-dots; prima flowers.
Thanks, as always, for looking.